How to add a new claimant
This article will explain how to create a new Claimant.
- Click on New Claim Intake Tab in the Dashboard.

- If you have an adjudication number (ADJXXXXX) for the claimant, you can use our EAMS Search function to pull claim information from California's Electronic Adjudication Management System (EAMS) database. This function will populate claimant and claim fields, saving time that would be used for data entry. It is essential to check that the information is correct during the intake process. Often, Claimants move home addresses, change phone numbers, or work with new attorneys between the time that the data were initially entered and the time that an examiner is seeing the claimant. Fill in all the information and make sure to fill in all the mandatory fields. Fill in all the information and make sure to fill in all the required fields. The Dashboard is the landing page of this application. The Dashboard will look different for each user. Let's take a look at each user's Dashboard.

- The data must be entered manually if you don't have the EAMS number.

Once all the information is entered, click Save & Close. A success message will appear, saying, "New Claimant added successfully." The claimant will be saved to the database and listed in the Claimants table, where it can be accessed and edited at any time. A success message will appear, saying, "New Claimant added successfully."

3.1.2 How to Add a New Claim
Now that the claimant is created, the next step is to enter the Claim information.
- Click on the Claimants tab on the left-side menu.

- Select a claimant for the claim to be created.

- Scroll down & Click on the New Claim button on the right bottom of the page.

- Claimant Details in the first tab are automatically pulled from the previous page.
- Select the payer from our electronic payer list.

- Claim Information has to be filled in, as mentioned below.
1. Claim Number - Please enter the claim number in the format displayed in the forms.
2. WCAB Number - The number used in the EAMS search. This number will automatically flow if it has already been used to search a claimant.
3. Exam Type - Please select the exam type from the drop-down. Please be aware that this information cannot be edited once a billable item is created for this claim.
4. Panel Number - Enter the panel number.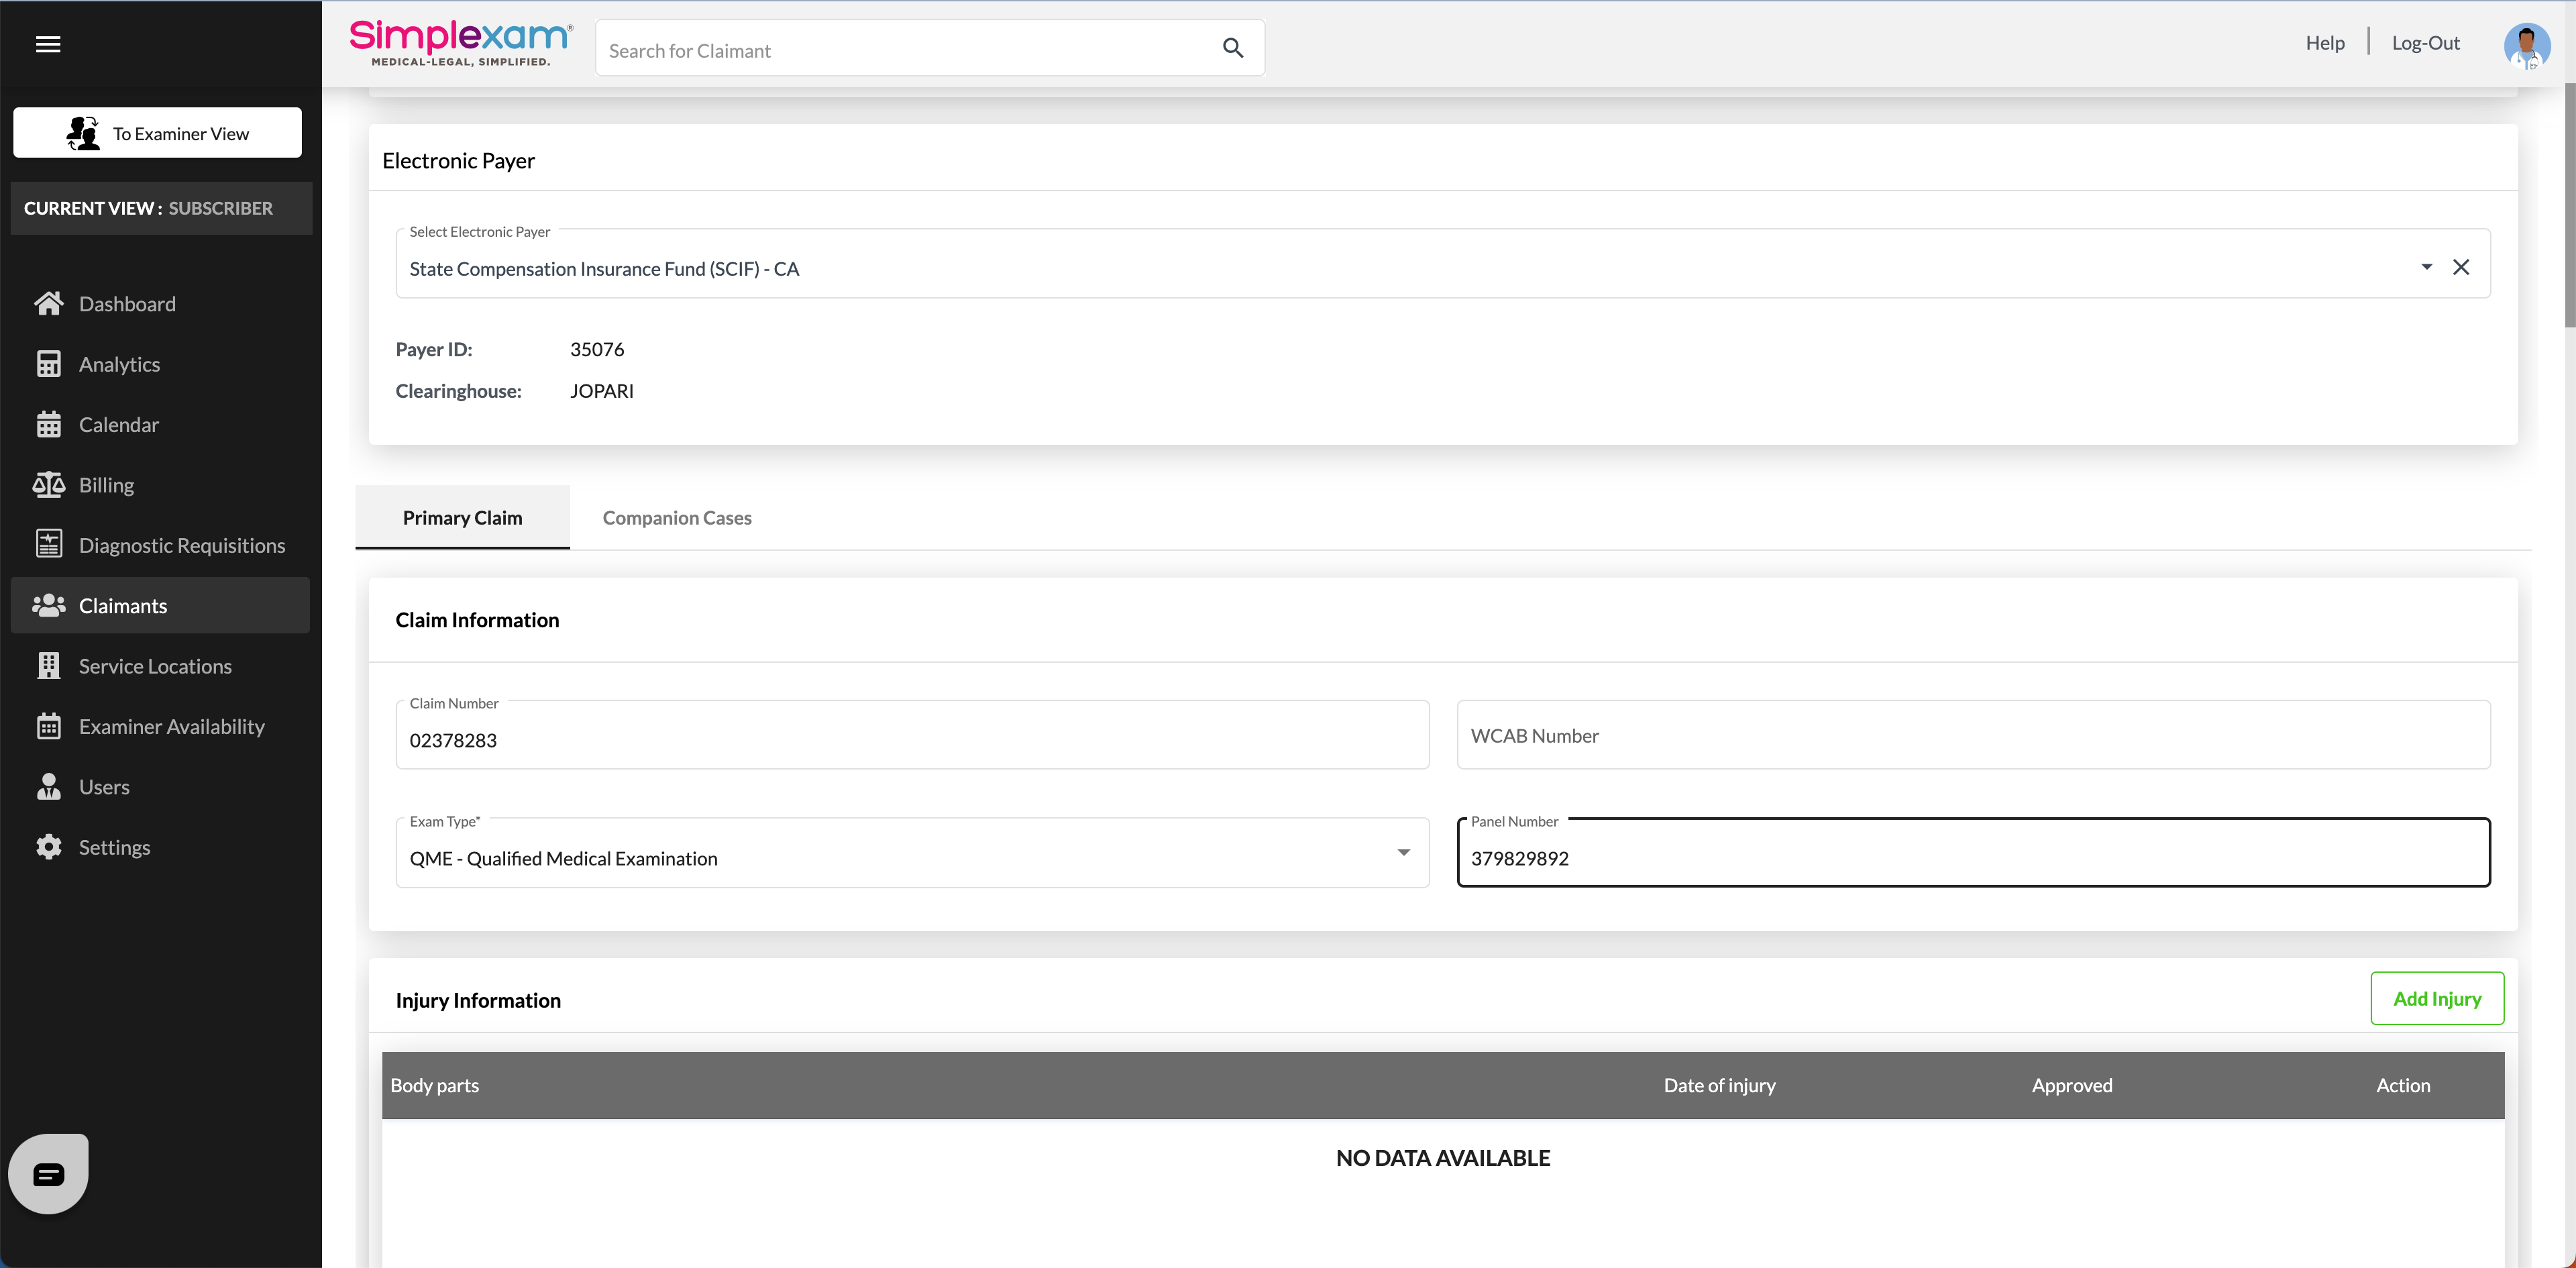
- If companion cases are associated with this claim, add them to the next tab, 'Companion Cases.'

- The Injury Information field has to be filled. This field will be filled if the claimant has been added with EAMS or can add the injuries manually by clicking the Add Injury button on the right side corner.

1. Click Add injury
2. Select the body parts in the drop-down. There is a search box to type in body parts or codes to add.
3. Once the body part is selected, select the injury date and add notes if there are any.
4. If it is a continuous trauma, select yes in the drop-down to enter the dates. If it is continuing, please select the current date.
5. Click Save.
- Once Injury is added, the next tab is Claims Administrator Information.
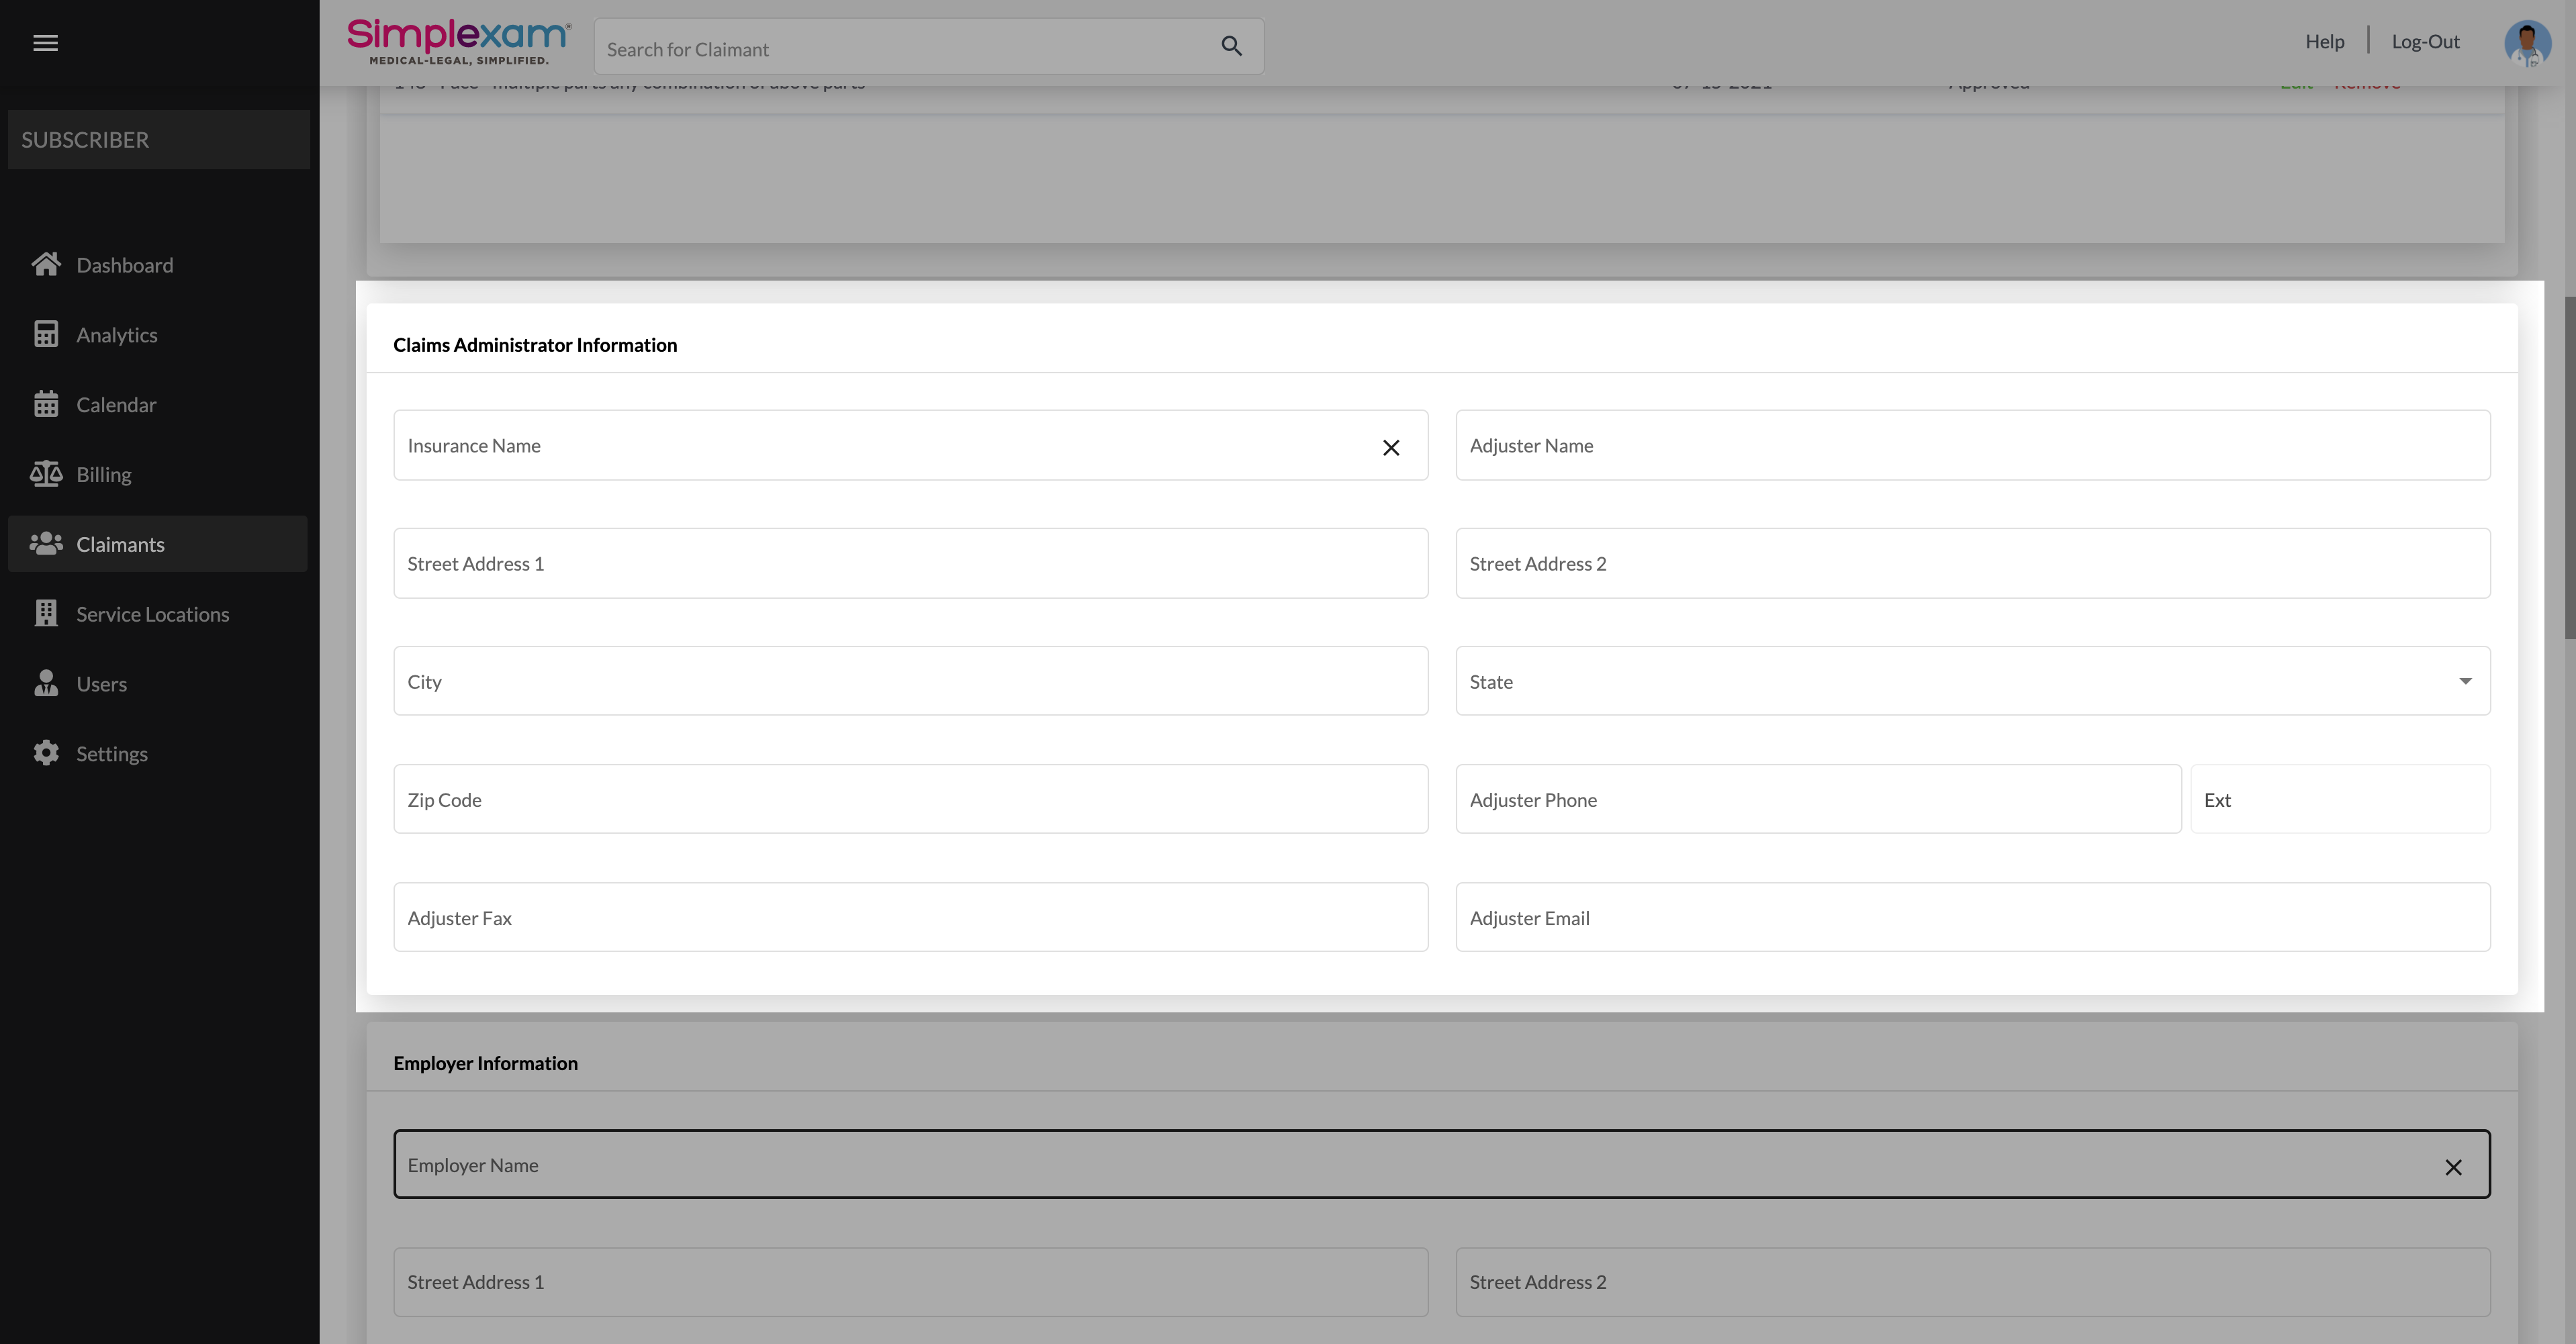
- Claims Administrator Information will be pulled from the EAMS if you have added the claimant through an EAMS search and if the claimant's Claims Administrator details are available on the EAMS website for the claimant. If not, please add all the details by selecting the claim administrator from the drop-down. If any details are missing, please add them manually.

- Move to Employer Information.
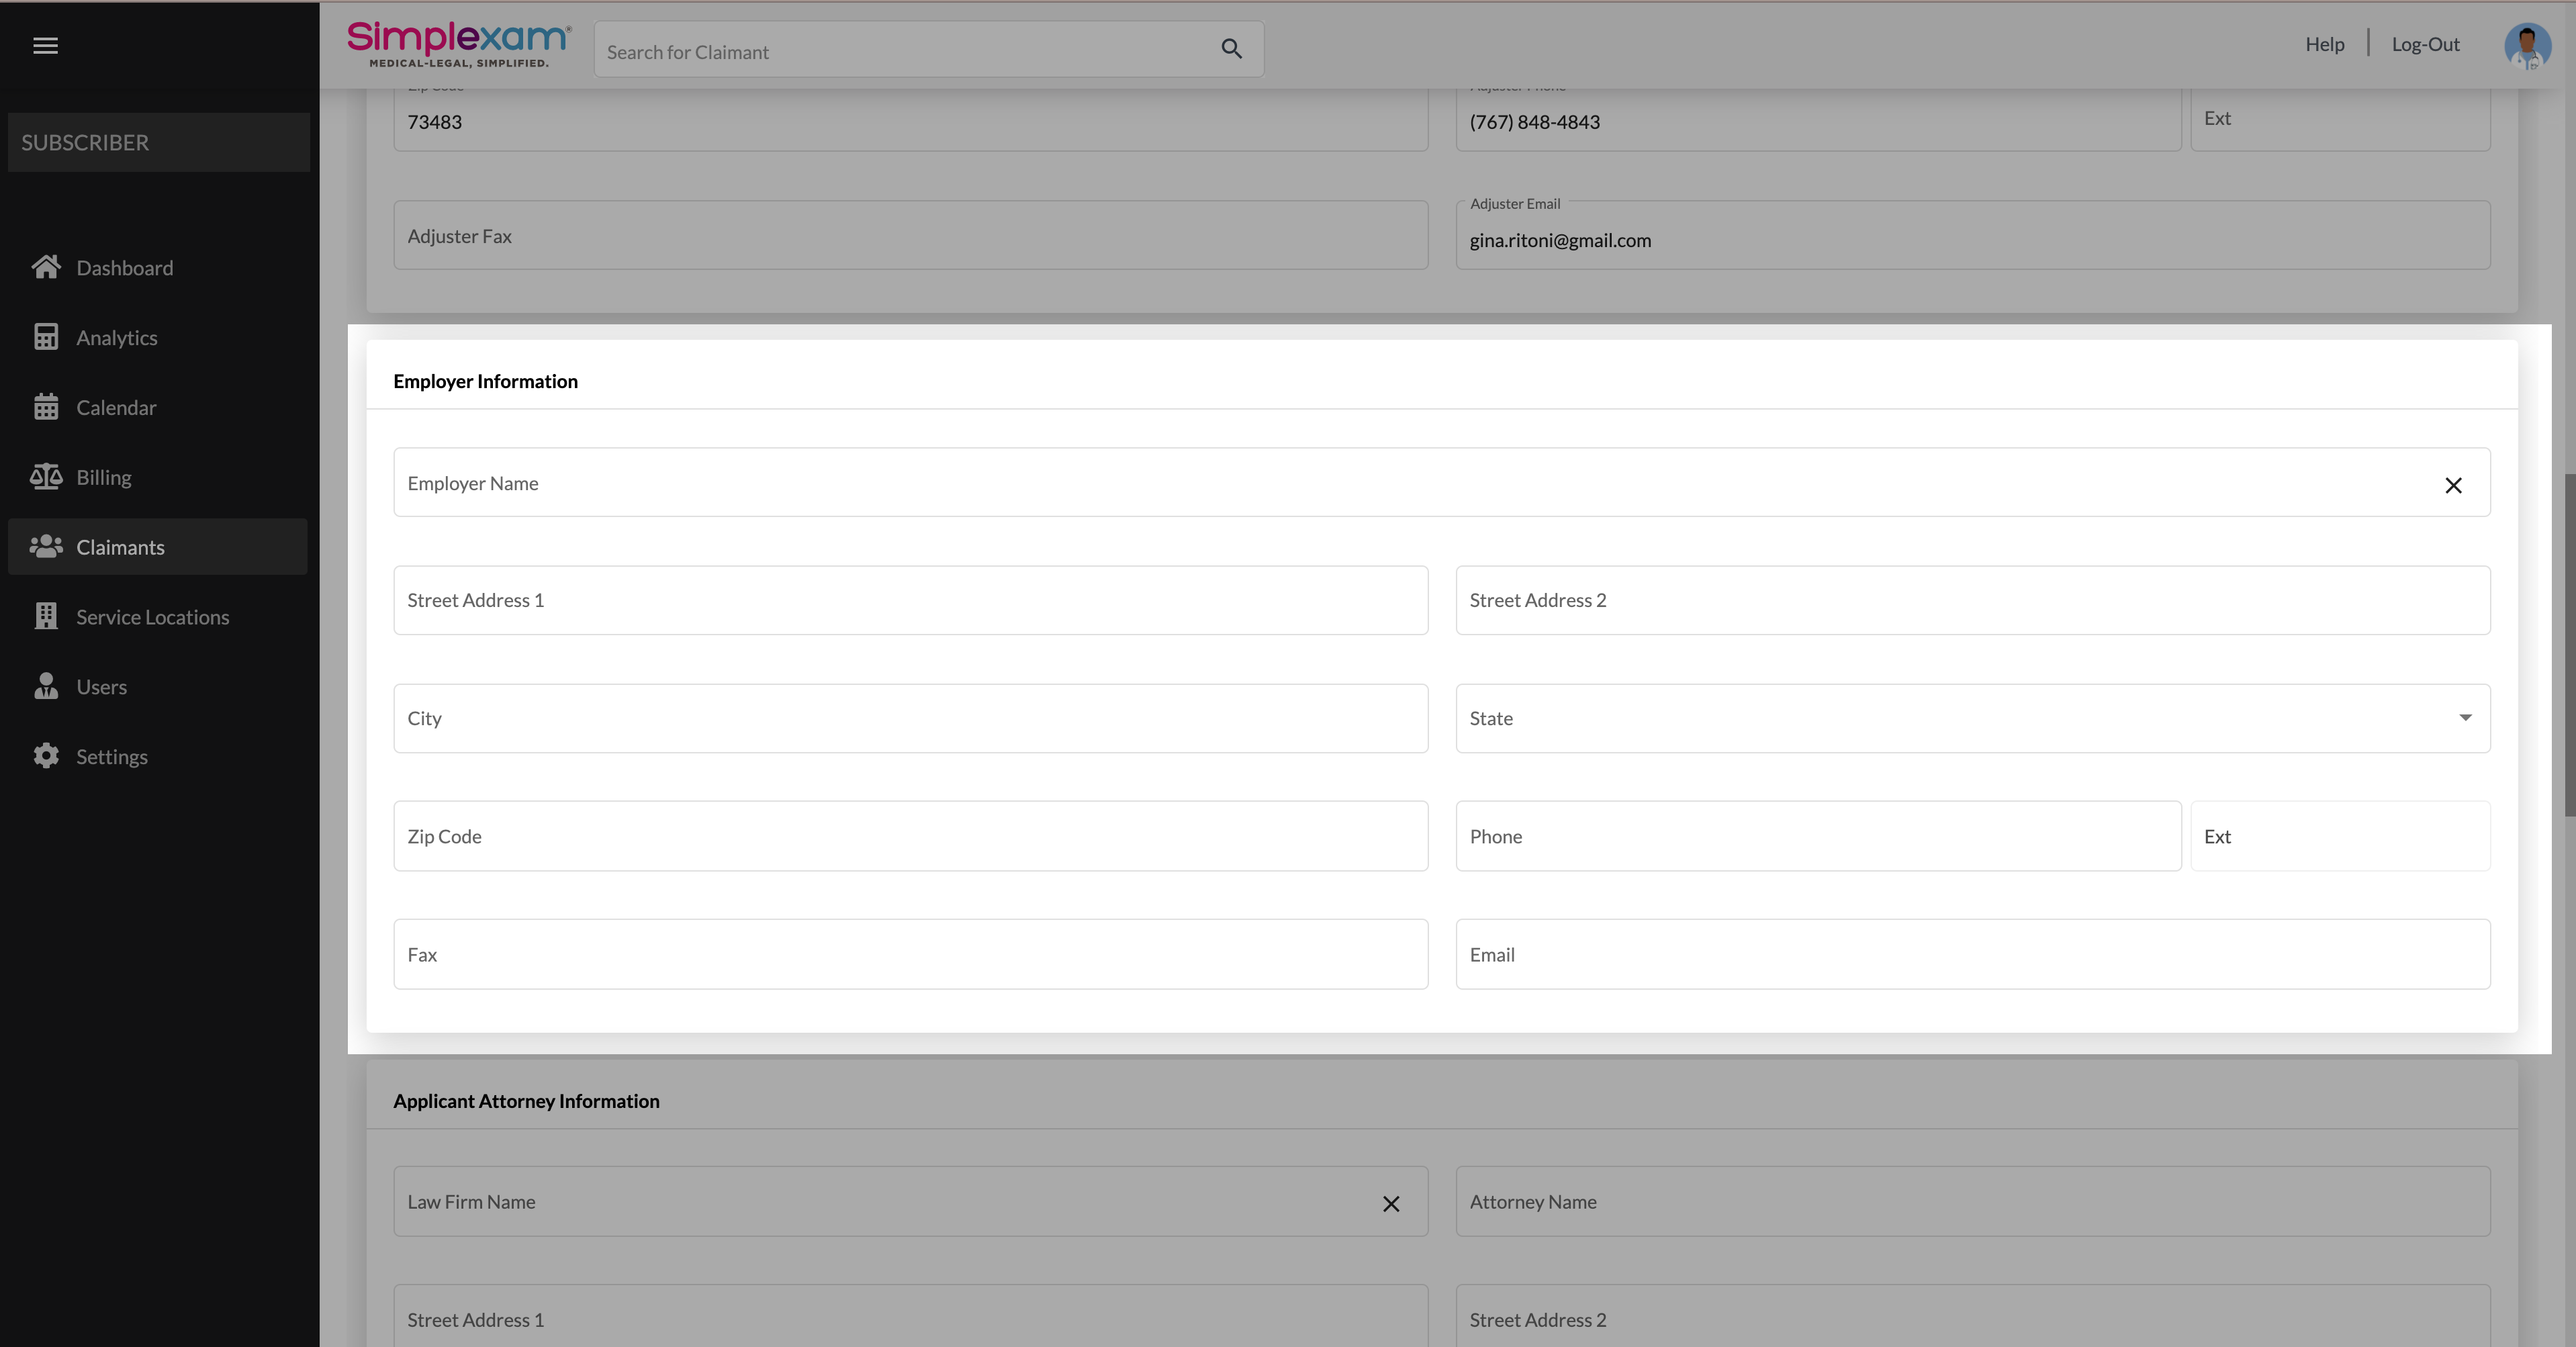
- Employer Information will be pulled from the EAMS if you have added the claimant through the EAMS search and if the Employer details are available on the EAMS website for the claimant. If not, please add the Employer Information manually.

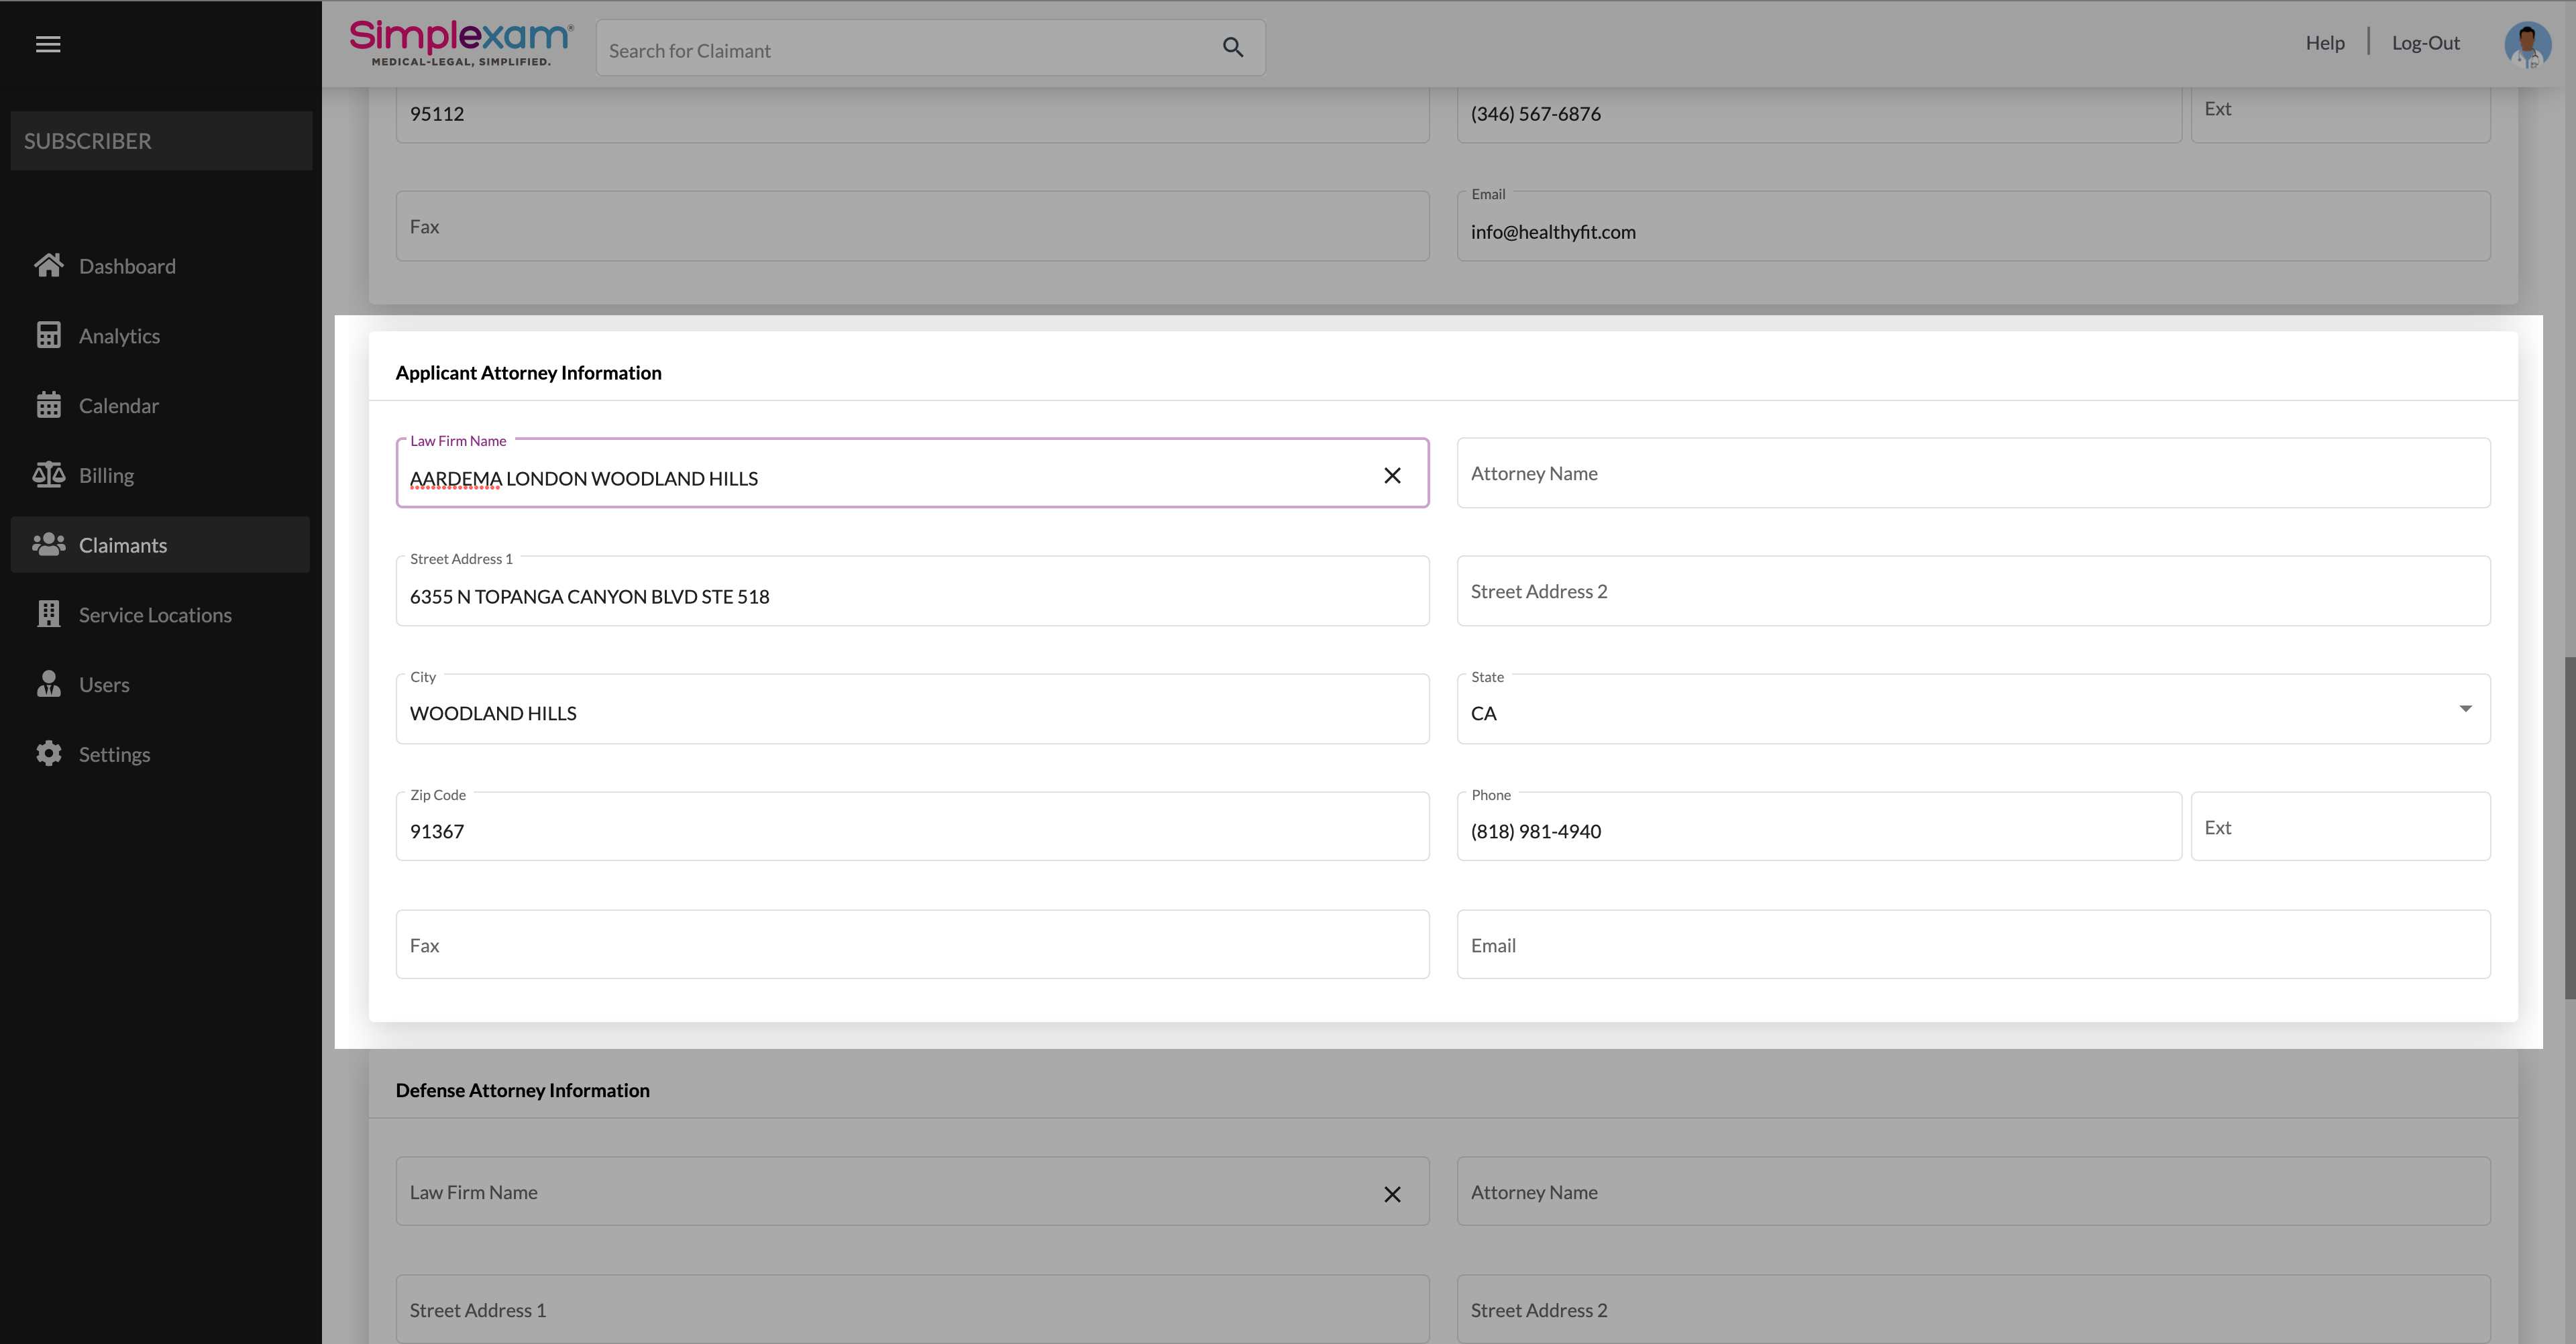
- Move to the Applicant Attorney.

- Applicant Attorney Information will be pulled from the EAMS if you have added the claimant through an EAMS search and if the claimant's Applicant Attorney details are available on the EAMS website. If not, please add all the details by selecting the Applicant Attorney from the Law Firm Name tab's drop-down. If any details are missing, please add them manually.
- Move to Defense Attorney.

- Defense Attorney Information will be pulled from the EAMS if you have added the claimant through the EAMS search and if the claimant's Defense Attorney details are available on the EAMS website for the claimant. If not, please add all the details by selecting the Defense Attorney from the drop-down in the Law Firm Name tab. If any details are missing, please add them manually.
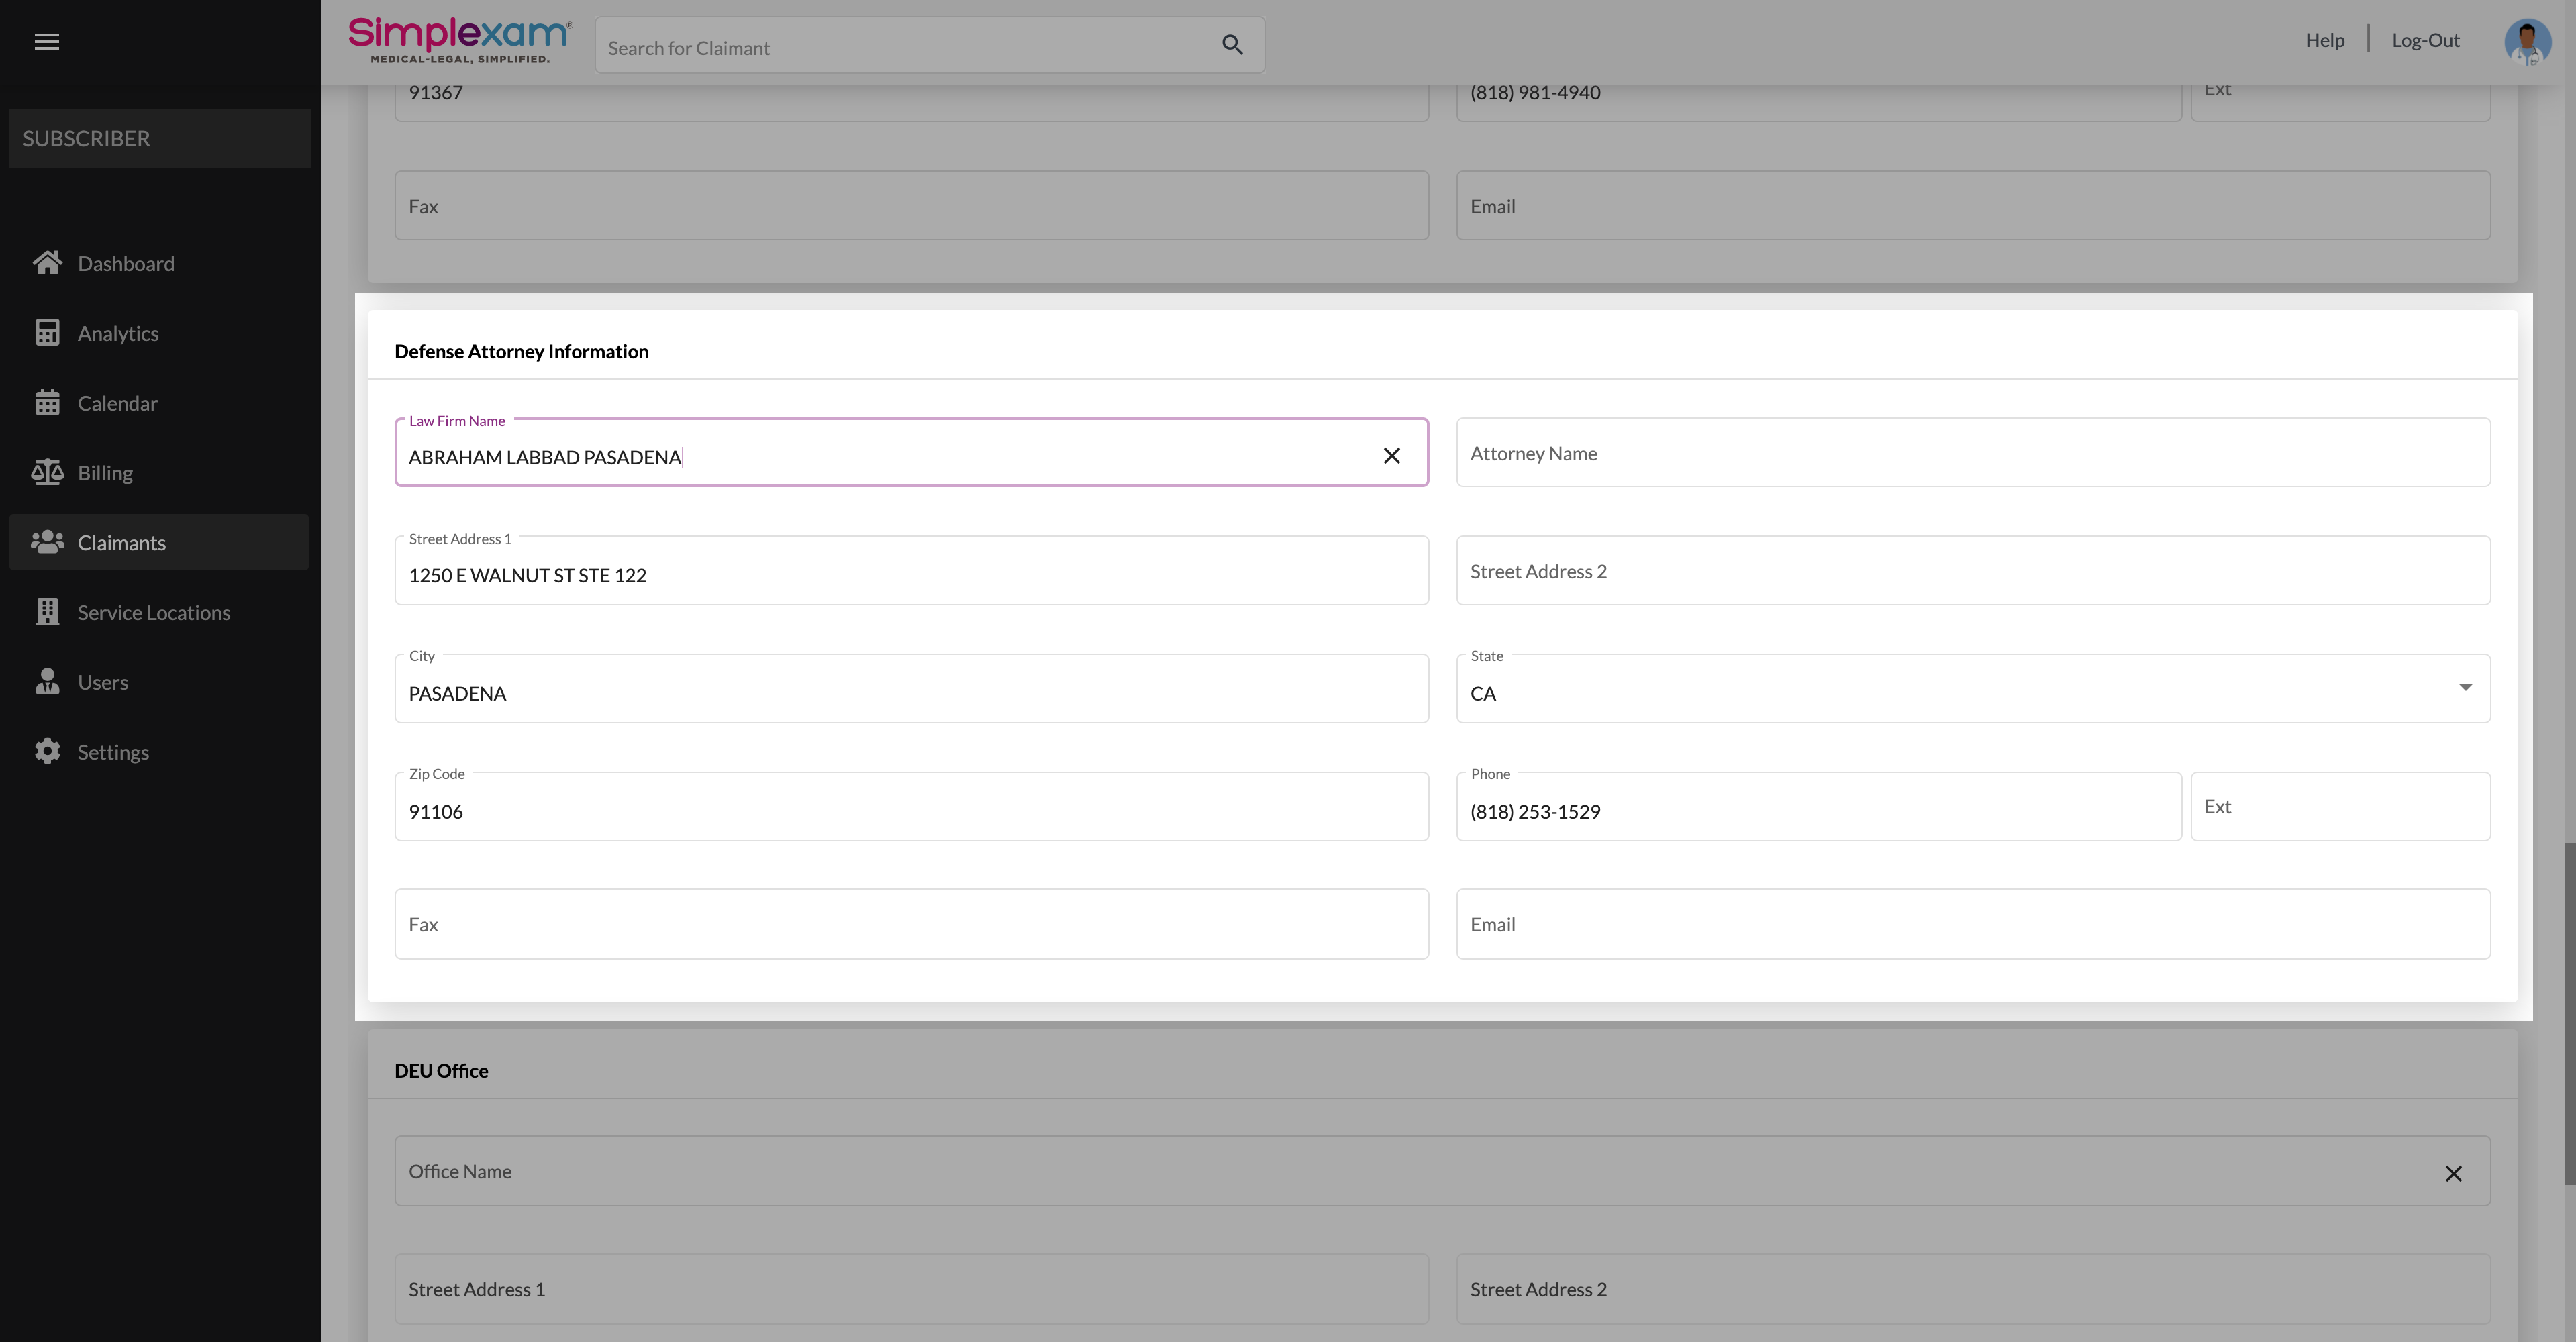
- Move to the DEU Office.

- The DEU Office has to be manually selected. Please click the Office Name tab to set the drop-down. Please add details that are missing after selecting the office.

- Click Save & Next. You will be directed to the billable item page and see a success message "Claim Created Successfully."

3.1.3 How to create a Billable Item
- Claimant & Claim information will show automatically from the information we entered on the previous page.
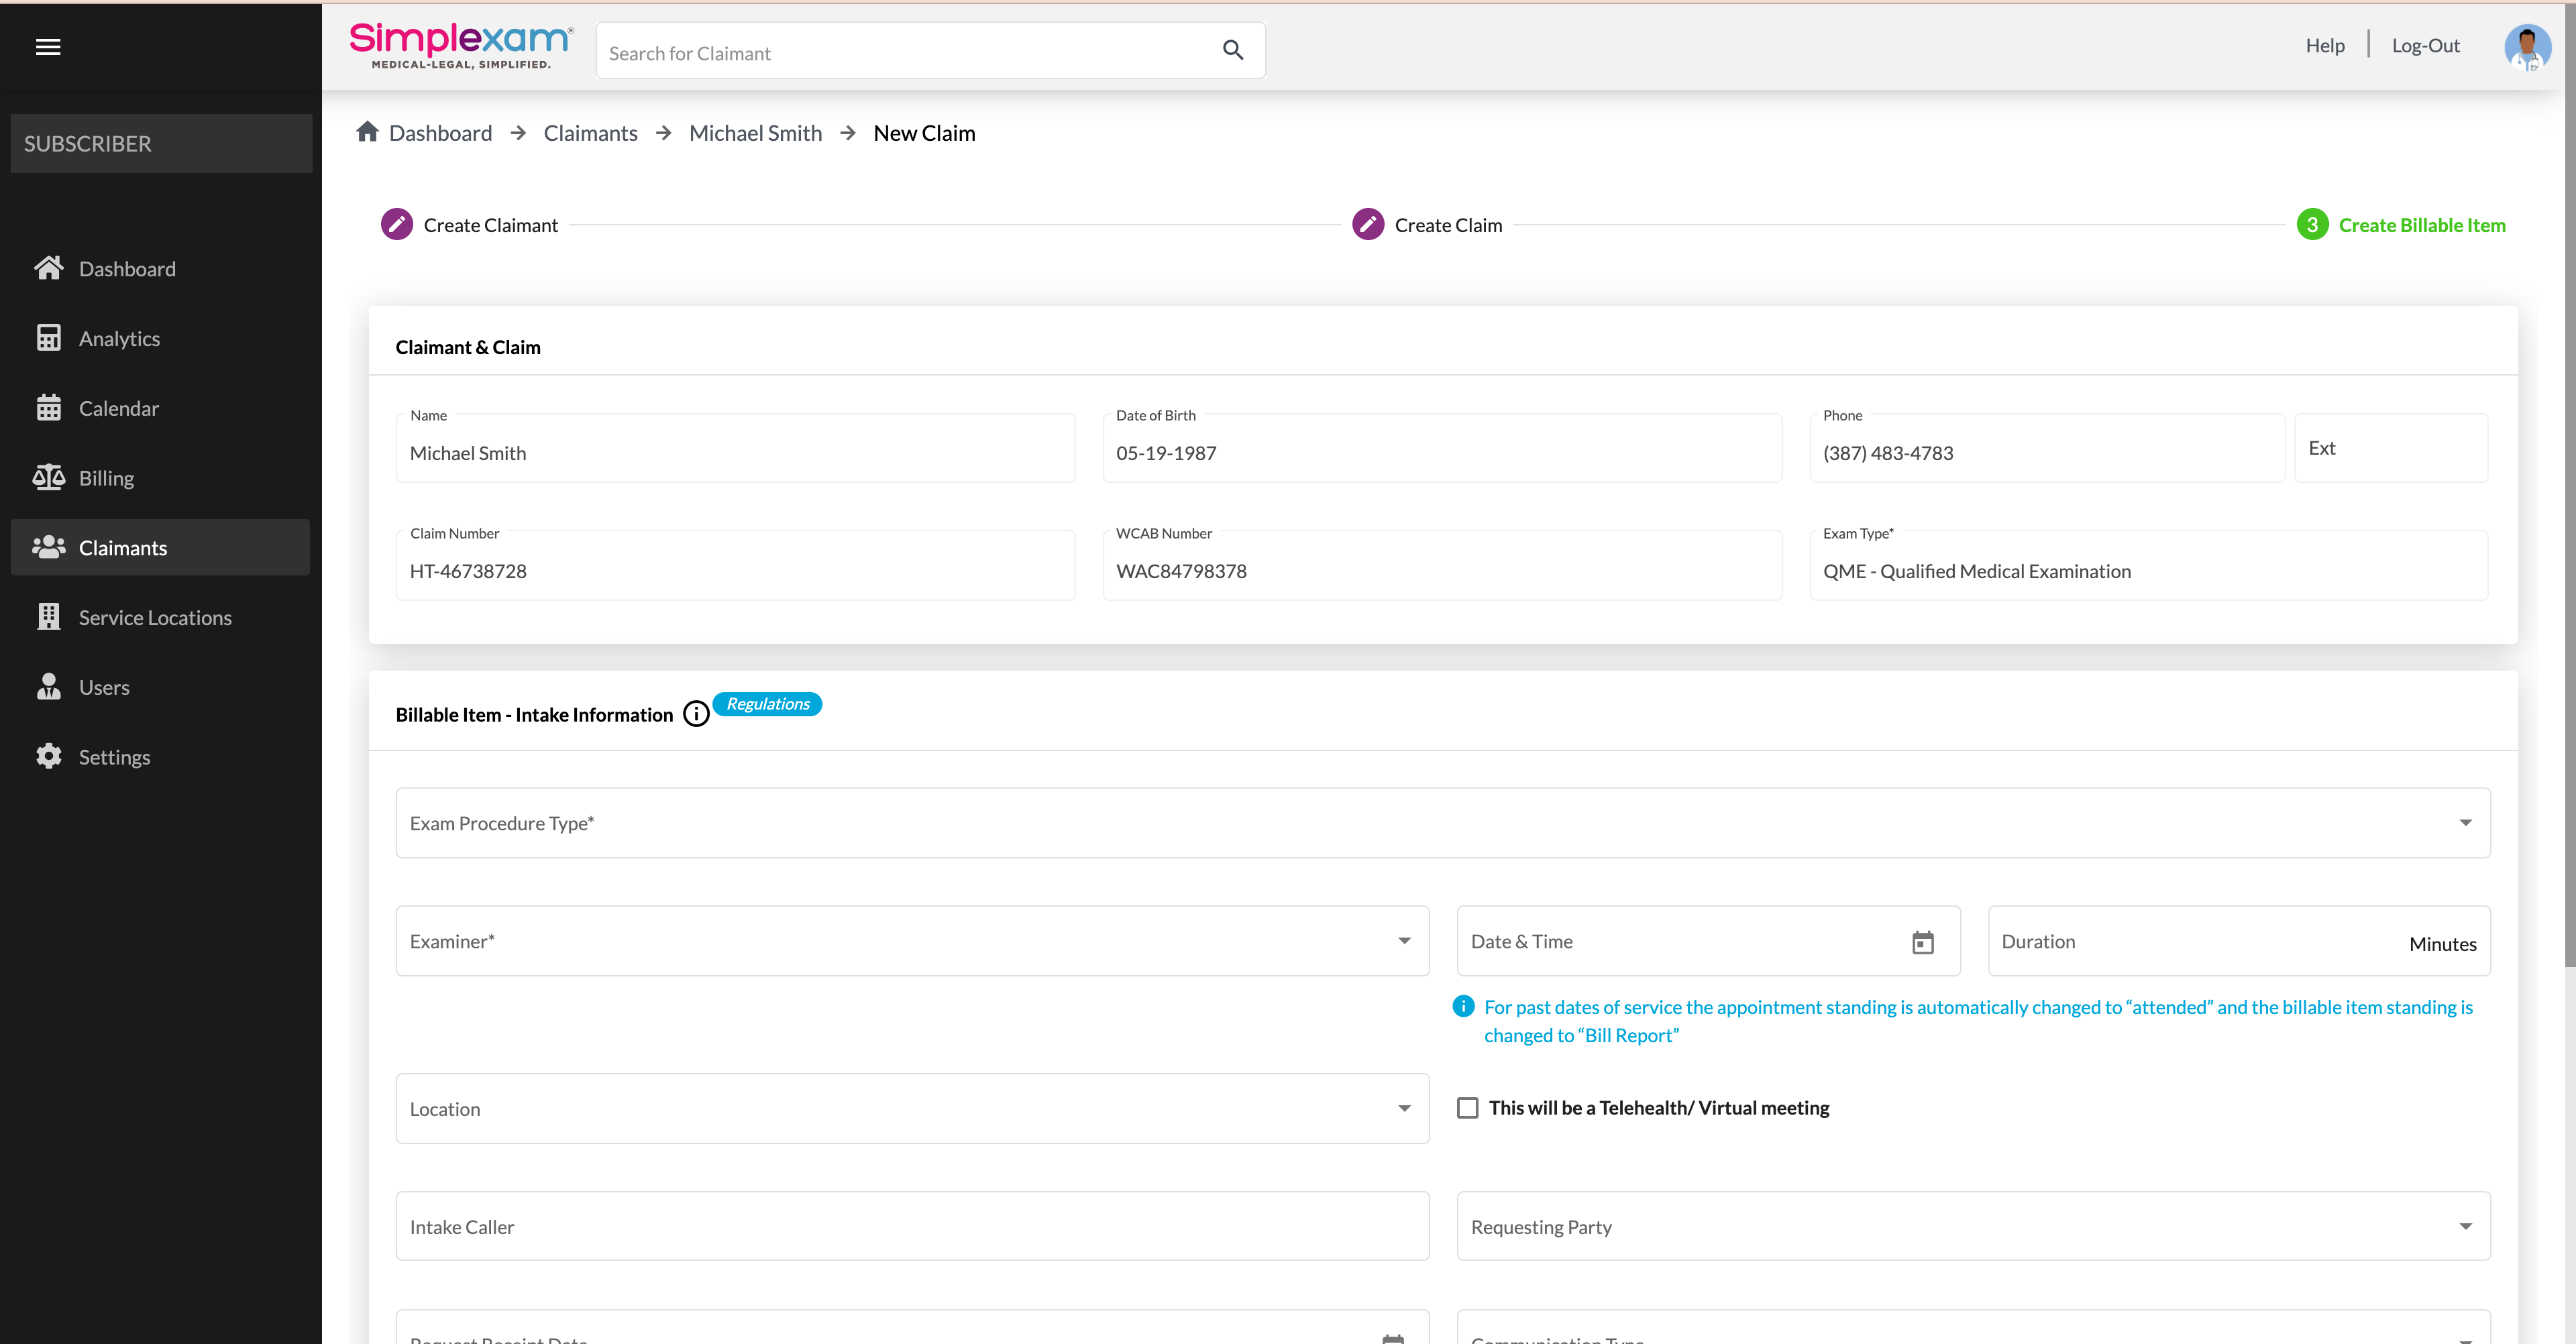
- Creating a billable item is the next step. Once we make a billable item, we cannot edit the Exam Type for this particular claim.
- Fill in all the details as mentioned below.
1. Exam Procedure Type - Please select an exam procedure type, as this is mandatory to create a billable item.
2. Examiner - Select an Examiner, as this field is mandatory to create a billable item. An Examiner cannot be edited/changed once selected.
3. Date & Time - Select the date and time for the selected procedure on a future date. If you have enabled the examiner availability, you can choose a date from the shown available date and time. For the past service date, the appointment standing is automatically changed to "attended," and the billable item standing is changed to "Bill Report."
4. Duration - Please select a duration from 1 to 450 Minutes.
5. Location - Select a preferred location. If it is an office visit, please select a preferred location with the location name and address.
6. Location - If it's a virtual location, Please select the box "This will be a Telehealth/Virtual meeting" and enter the Telehealth Information.
7. Intake Caller - Person who booked this appointment.
8. Requesting Party - The person who wanted to make this appointment.
9. Request Receipt Date - The date this appointment was requested.
10. Communication Type - The type of communication through which this appointment was confirmed.
11. Intake Contact Phone - Phone number of the person who booked this appointment.
12. Intake Contact Fax - Fax number of the person who booked this appointment.
13. Intake Contact Email - Email ID of the person who booked this appointment.
14. Intake Notes - Any notes associated with this appointment.
- Once all the details have been filled in, click Save. You will receive a pop-up saying, "Billable Item Created Successfully."
- Billable Item is created successfully.
Was this article helpful?
That’s Great!
Thank you for your feedback
Sorry! We couldn't be helpful
Thank you for your feedback
Feedback sent
We appreciate your effort and will try to fix the article